And the floor, of course, which we received today. Mom went to Anderson's Alternatives and picked up 34 six-foot long boxes of flooring planks. We unpacked and unloaded it into the horse trailer, which will be home for the bamboo for a while. Common practice is to allow new flooring boards to acclimatize for a week or two before installation, so the trailer is a perfect place - dry and protected, but fairly open to the humidity levels of our area. This obviously puts us back at least a week, but no matter. We have decided to wait for Manda's upcoming visit to erect the yurt anyway!
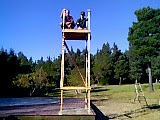
In the meantime, we're trying to tie up lots of loose ends (we love to tie up ends) so we'll be ready to throw up the yurt in just a couple of days. Today Erin and I started and completed the scaffolding that will be used in the erection of the yurt. We put many 2x4 scraps to good use, and used the rest of the long boards as well. The height is actually 13 feet, but the plan calls for adjustable beams on the top which we will clamp to the existing corner posts.

Bill & Erin climbed the scaffold -
they scaled up opposite sides simultaneously while
mom and I held our breath and looked away.
Unfortunately, all I had was the cell phone camera,
so this photo is tiny. Erin says it felt really high up. It is!
So all told, the scaffolding will be about 14 feet high, and will hold the center ceiling ring up in the air above the yurt floor while we attach the rafters to it. Speaking of rafters.....
Well done Colorado Yurt Company! We received 4 beautifully packaged cartons of yurt rafters from our good FedEx buddy Evan this afternoon. I wish I had photos (again) because words cannot describe how different this shipment was from the last one. It was with sheer delight that mom signed her name on the line, and Erin and Evan unloaded the gigantic boxes from the delivery truck. Yahoo!
More loose ends to tie before our three-day erection party:
- order 25 - 3/4 inch plywood sheets (much debate has gone into whether to use 1/2" or 3/4". we've ultimately decided on 3/4" because the bamboo flooring isn't quite as stiff as we'd imagined it)
- install our plywood sheets over the insulation and joists using screws and construction adhesive
- design a plan & install bamboo flooring using a compression flooring nailer (borrowed from Mickey, Erin's surfing/glider-flying buddy who installs hardwood floors for a living)
- re-create our custom 15' router-compass and cut another perfect circle through the plywood and bamboo layers
- measure, make and paint our bender board, which will encircle the plywood and bamboo flooring & provide a backdrop for the lattice and brackets
2 comments:
Simply Yurtiful!
That is high up there in a perch of wood and skinny metal pipes and extremely top heavy...good plan to mount it together in a counter weight fashion. Well written Lindsey. Sounds like you are enjoying the journey to yurtdom.
Post a Comment